We have discussed the fundamentals of JNDI and a naming example in the previous sections.In this chapter we are looking into how the accessing LDAP in Java.JNDI plays the key role in looking up the directory objects in the LDAP server.Let us start with a quick overview on LDAP. The example shows how JNDI is using to access directory objects.
Overview to LDAP
The name LDAP stands for Light weight Directory Access protocol . LDAP is a protocol for maintaining distributed directory information services over internet.Directory services provides organized set of records in a hierarchical order(Example : Telephone directory) . In this chapter we are discussing how to access the directory attributes from an LDAP server using a Java program which uses JNDI.
Accessing LDAP using JNDI
Before proceeding to the example we should have an accessible LDAP server running . We are running an LDAP server in our local machine.When the server is ready we need to create a directory object and we need to add few attributes to the object . After those things completed , we can write the Java code to access the attribute values of directory object we created .We are using Apache Directory Studio for creating and managing LDAP server. (Alternately we can use eclipse for managing LDAP. For that we need to update eclipse with the URL :http://directory.apache.org/studio/update/2.x ). Here we are using Apache Directory Studio for managing LDAP.
Let us start our example from scratch.We need to setup the LDAP server and directory objects using Apache Directory Studio first. Then we need to write the Java code for accessing the LDAP. LDAP support is existing with JDK itself.So ,no third party API is needed.We are discussing all the procedures to access LDAP from Java in steps.
Step 1)If JDK is not installed ,please download and install.
Step2)If eclipse indigo (or any other eclipse distribution) is not installed , please download and extract to any folder and open it by clicking on the icon.
Step3)Download and install Apache Directory Studio.
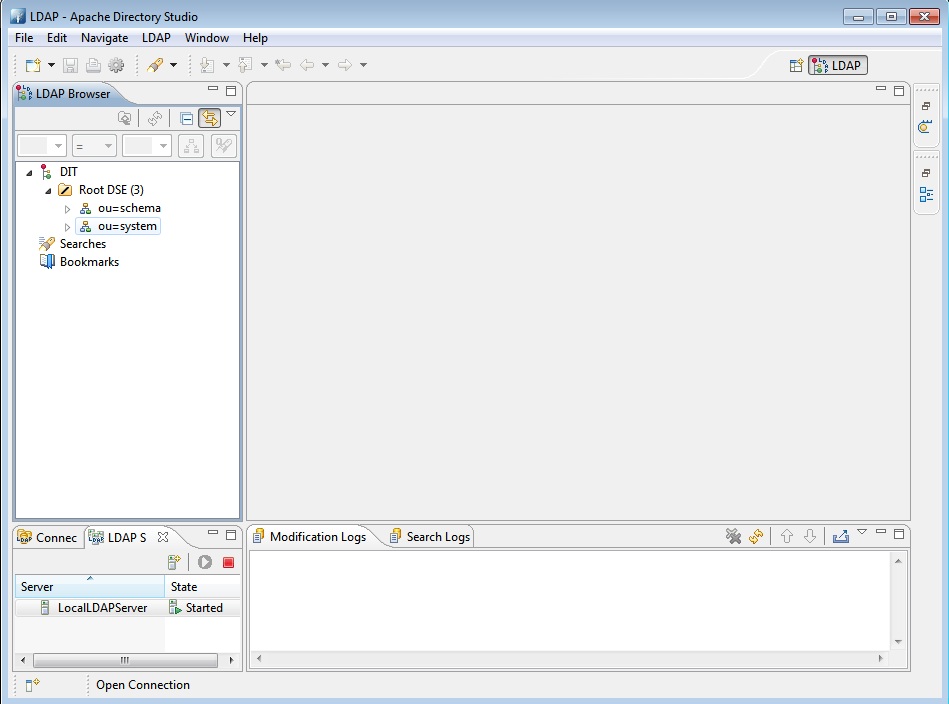
Step4)Open Apache Directory Studio.
Step5)Right click on the server console of directory studio.Select New–>New server
Step6)Create a new server with suitable name(In our example it is LocalLDAPServer)
Step7)Run the server by right clicking on the server instance.
Step 8)When the server is started , right click on the server instance and select create connection option.
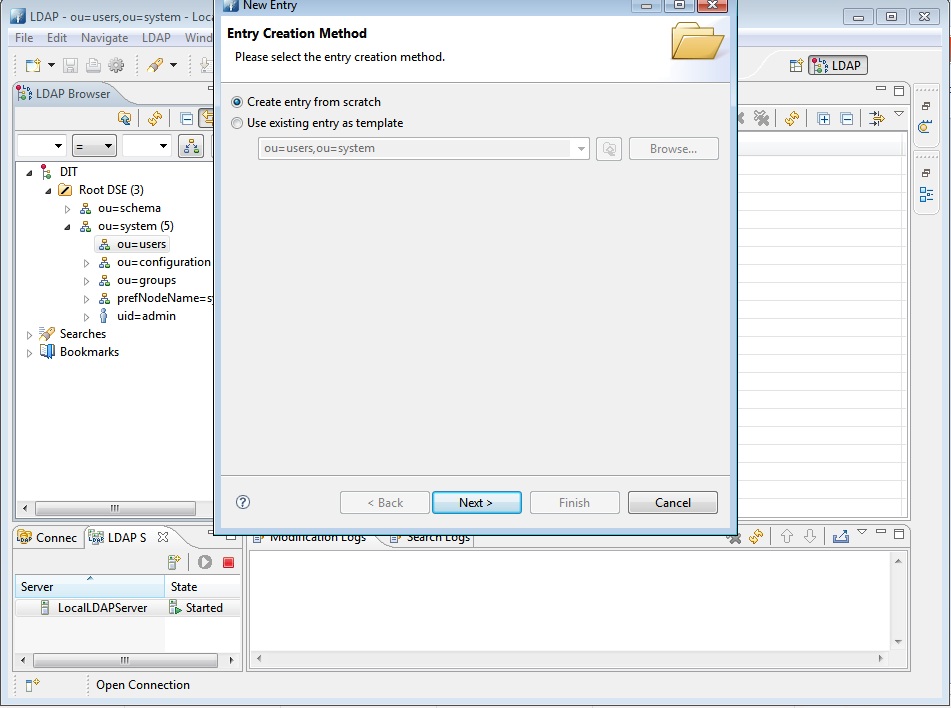
Step 9)Once the connection is established , the LDAP browser will show the directory Tree. Click on the DIT .Expand the ou=system.
Step 10)Right click on ou=users . Then New –>New Entry. Select create entry from scratch option. Then click next.
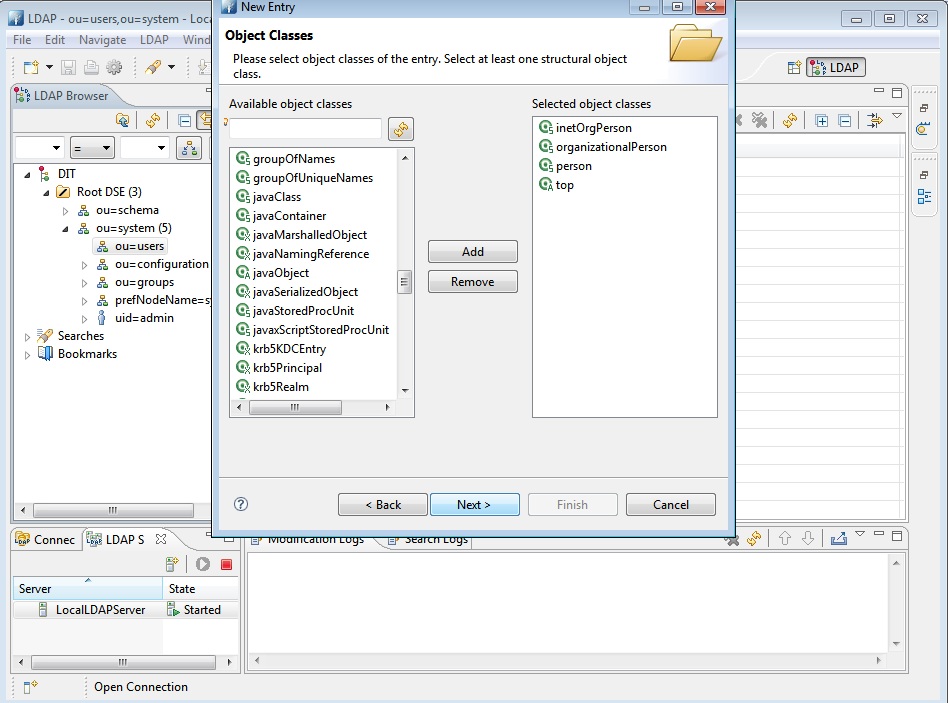
Step 11)Select inetOrgPerson as object class and click on add button.
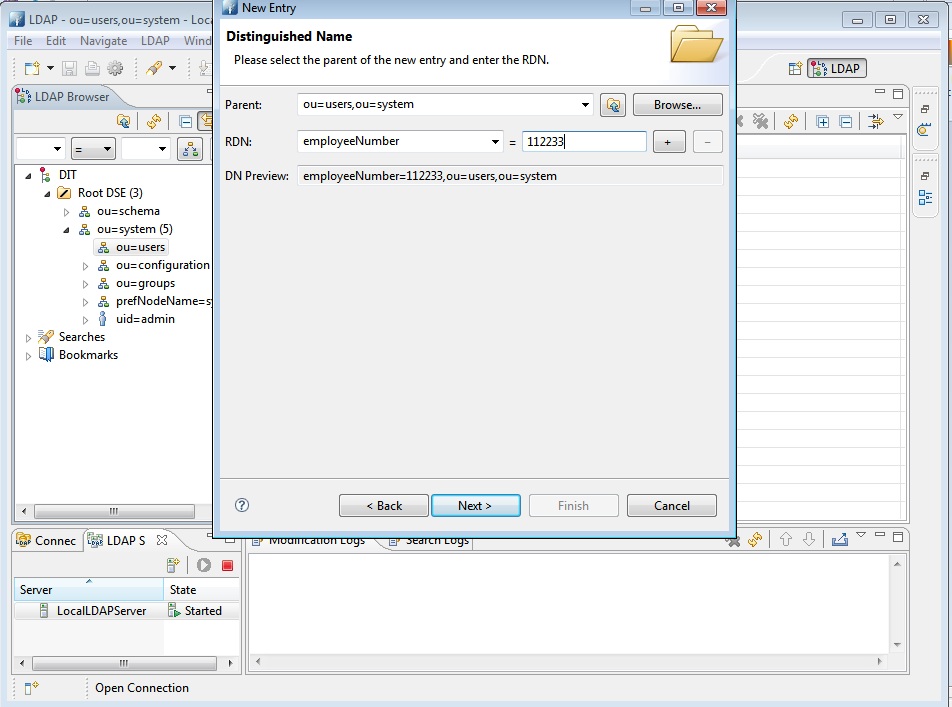
Step 12)Select employeeNumber as RDN and give any value as shown here.Then click next.
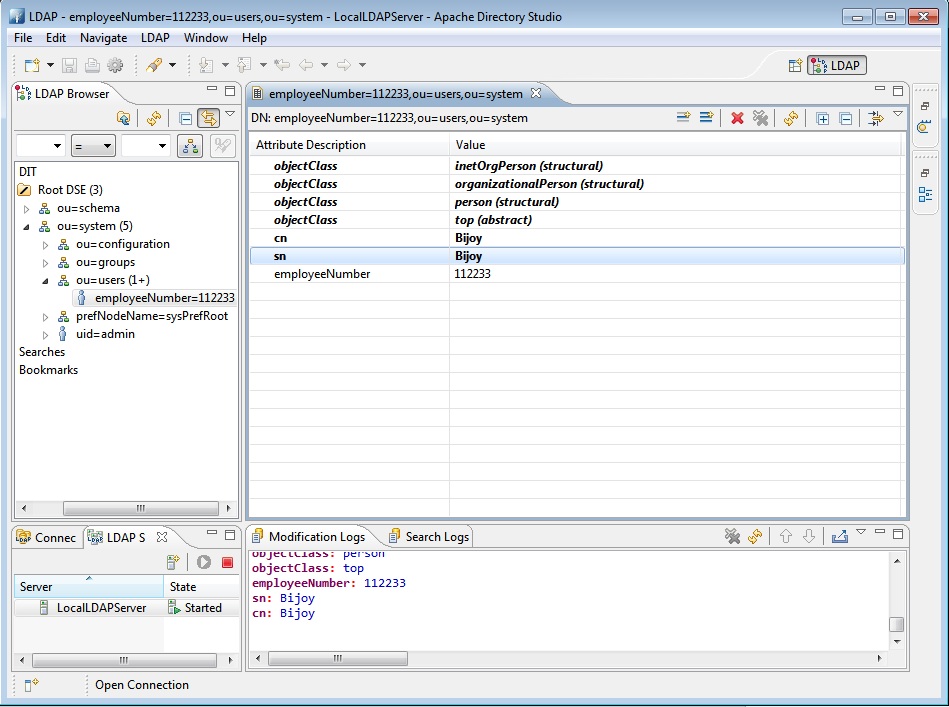
Step13)Finish the directory object creation(Give suitable cn and sn .cn is the common name and sn is the surname of user). Following screen will be displayed.
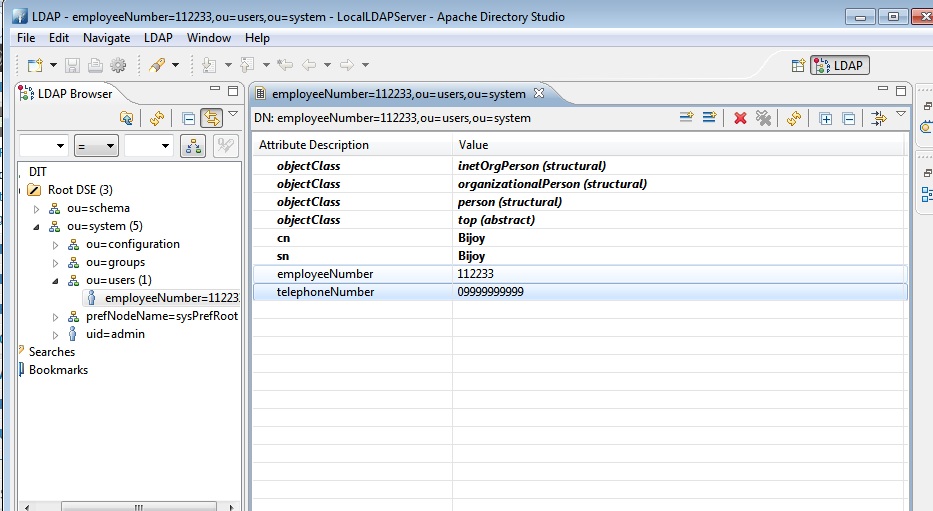
Step14)Right click on the object explorer and select New Attribute option .Select telephoneNumber from the list. Press Finish button.Now give suitable telephone number as value to the attribute.
Step 15)Now the details will be displayed in the directory studio console.User attributes will be displayed.Look for a url like ldap://localhost:10389 . This URL we need to use with our Java code while initializing the context.
Step 16)Create a Java application in eclipse and create a class DirectorySample.java in it. The class is shown below. It simply fetches the user we created now. We are doing search in the LDAP based on few attribute values(employeeNumber). Then fetching other attribute values like cn , sn and telephoneNumber of the directory object.
DirectorySample.java
import java.util.Properties;

import javax.naming.Context;

import javax.naming.NamingException;

import javax.naming.directory.Attributes;

import javax.naming.directory.DirContext;

import javax.naming.directory.InitialDirContext;
public class DirectorySample {
public DirectorySample() {
}
public void doLookup() {
Properties properties = new Properties();
properties.put(Context.INITIAL_CONTEXT_FACTORY,
"com.sun.jndi.ldap.LdapCtxFactory");
properties.put(Context.PROVIDER_URL, "ldap://localhost:10389");
try {
DirContext context = new InitialDirContext(properties);
Attributes attrs = context
.getAttributes("employeeNumber=112233,ou=users,ou=system");
System.out.println("Surname: " + attrs.get("sn").get());
System.out.println("Common name : " + attrs.get("cn").get());
System.out.println("telephone number : "
+ attrs.get("telephoneNumber").get());
} catch (NamingException e) {
e.printStackTrace();
}
}
public static void main(String[] args) {
DirectorySample sample = new DirectorySample();
sample.doLookup();
}
}
Step 17)Compile and run the above application. Make sure the correct Context.PROVIDER_URL is provided as discussed in the step 15.
Now lets see the output.
Output
Surname: Bijoy
Common name : Bijoy
telephone number : 09999999999
See also:
Deleting attribute in an LDAP entry
Adding attribute to existing LDAP entry
