We discussed the fundamentals of Enterprise Java Beans earlier.Also we discussed Stateless Session Bean as well as Stateful Session Bean with examples. We did a comparison of Stateful Session Bean and Stateless Session Bean by using examples .Now it is the time to look into the details of Message Driven Beans. Like the previous examples, here also we are using EJB 3.x as EJB implementation.
Message Driven Beans – An overview
A Message Driven Bean is equivalent to an Asynchronous Message Receiver . We already discussed the basics of asynchronous and synchronous message consumptions in Java Message Service with examples . In case of of synchronous message consumption , the application execution stops at the receive() method. So synchronous message consumption is not an effective way to receive messages. In case of asynchronous message consumption , the consuming class needs to implement the MessageListener interface. There , if a message arrives the onMessage() method will be invoked.The Message Driven Bean is a server side component which receives messages asynchronously.
In case of Session Beans, there were remote and home interfaces for the beans to access it from client side. In case of Message Driven Bean , there is no remote or home interfaces. Clients are not invoking Message Driven Bean instances by using JNDI.Instead clients can send JMS Messages to the corresponding queue or topic destinations.(Discussed in JMS Tutorial). Message Driven Beans will be invoked , when it detects a message in the destination to which it is listening.
Message Driven Bean Life Cycle
Like a Stateless Session Bean , a Message Driven Bean has only two stages in its life cycle.
1)Non Existing State
2)Ready State
EJB Message Driven Bean Example
Tools & Software Required
1)Java EE SDK 1.6 – Download link
2)Eclipse Indigo – Download link
3)JBoss-6.0.0.M1 – Download link
Steps
1)Install Java EE if not installed already. Extract Eclipse and JBoss to suitable locations. Open eclipse in a suitable workspace.
2)File —>New —>EJB Project
Select JBoss 6.x as target run time and EJB 3.0 as EJB Version.Give suitable name to the project.In this case we are giving as MDBSample.
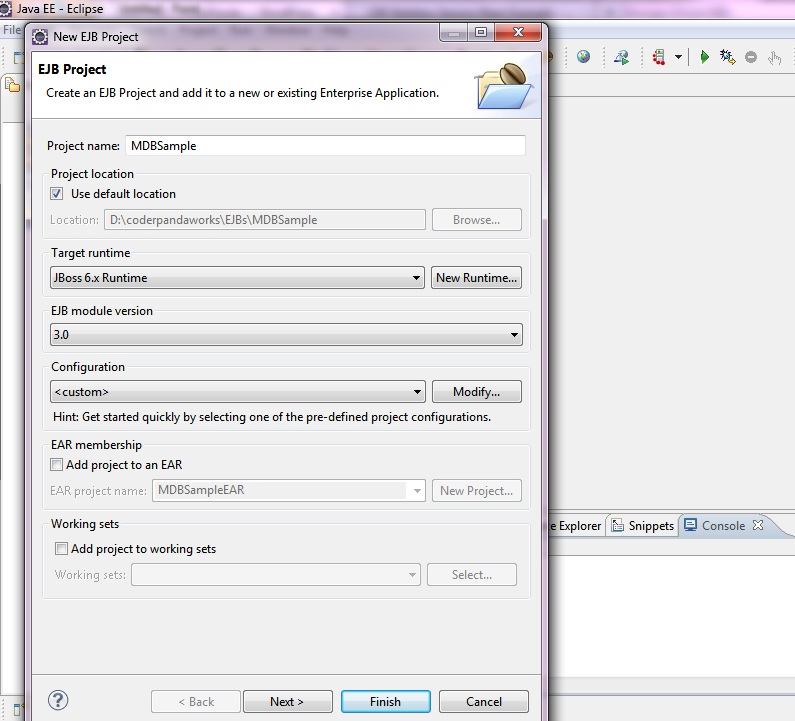
Press Finish.
3)Now expand the project tree and create a new package in ejbModules.In this case , my package name is com.mdb.
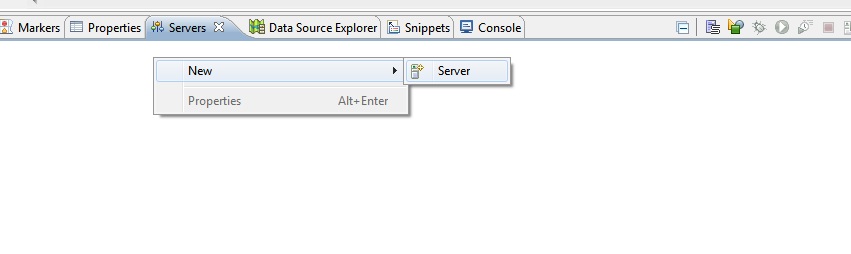
4)Create a server instance by selecting the server tab near console.And add the newly created MDbSample project into it.
 5)Now we need to create the Message Driven Bean. As we discussed earlier , a Message Driven Bean should be listening to a destination . In this example, we are deploying our bean to JBoss 6.0.0.M1. So first we should identify the destination options available in our JBoss version.
Now open JBOSS_HOME\server\default\deploy\messaging\destinations-service.xml
The configured queue destinations will be listed there.We are taking the destination /queue/DLQ.
6)Right click on the package name in the ejbModules and NEW–>Message Driven Bean. Give suitable name.In this example , I am giving the name as MDBSample
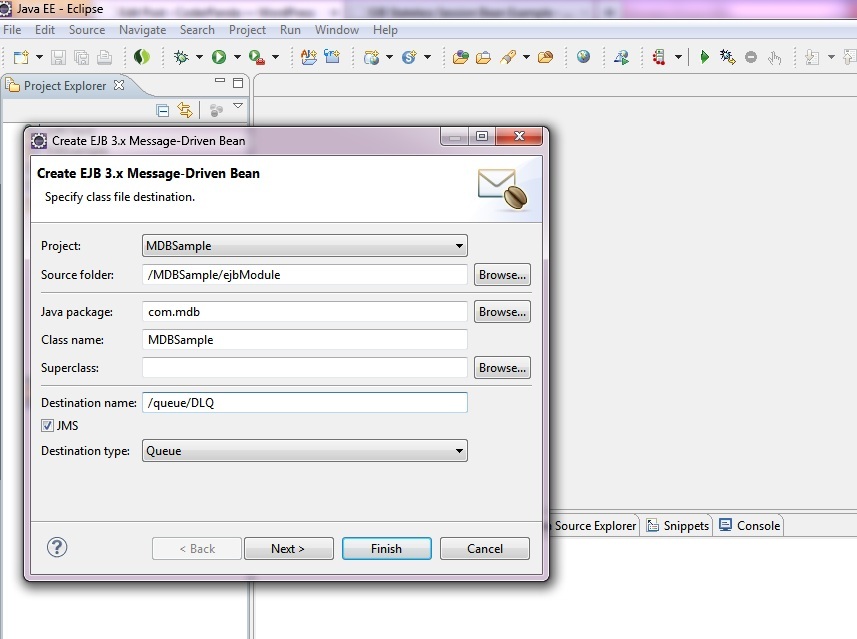
Select destination type as Queue. Press Finish.
7)Paste the below contents to the generated .MDBSample.java
MDBSample.java
import javax.ejb.ActivationConfigProperty;

import javax.ejb.MessageDriven;

import javax.jms.JMSException;

import javax.jms.Message;

import javax.jms.MessageListener;

import javax.jms.TextMessage;
import org.slf4j.Logger;
import org.slf4j.LoggerFactory;
/**
* Message-Driven Bean implementation class for: MDBSample
*
*/
@MessageDriven(activationConfig = {
@ActivationConfigProperty(propertyName = "destinationType", propertyValue = "javax.jms.Queue"),
@ActivationConfigProperty(propertyName = "destination", propertyValue = "/queue/DLQ") })
public class MDBSample implements MessageListener {
private static Logger LOGGER = LoggerFactory.getLogger(MDBSample.class);
/**
* Default constructor.
*/
public MDBSample() {
}
/**
* @see MessageListener#onMessage(Message)
*/
public void onMessage(Message message) {
if (message instanceof TextMessage) {
TextMessage text = (TextMessage) message;
try {
LOGGER.info("Message received :" + text.getText());
} catch (JMSException e) {
e.printStackTrace();
}
}
}
}
The bean simply receives messages from the queue and displays in the console/log , if it is a text message.
8)Now we need to develop a client application.
Steps involved are:
a)Get administered objects( connection factory and destination). We already decided our destination as /queue/DLQ. We can find the available connection factories at JBoss_Home\server\default\deploy\messaging\connection-factories-service.xml . We are using /ConnectionFactory as the connection factory.
b)Create a QueueConnection object
c)Create QueueSession object
d)Create QueueSender object
e)Start connection
f) Create and send few text messages to the destination.
g)Close the connection.
Create a dynamic web application. Create the following class in it.
MessageSender.java
import java.util.Properties;

import javax.jms.JMSException;

import javax.jms.Queue;

import javax.jms.QueueConnection;

import javax.jms.QueueConnectionFactory;

import javax.jms.QueueSender;

import javax.jms.QueueSession;

import javax.jms.TextMessage;

import javax.naming.Context;

import javax.naming.InitialContext;

import javax.naming.NamingException;
public class MessageSender {
private Context context = null;
private QueueConnectionFactory factory = null;
private QueueConnection connection = null;
private Queue queue = null;
private QueueSession session = null;
private QueueSender sender = null;
public static void main(String[] args) {
MessageSender sender = new MessageSender();
sender.sendmessage();
}
public void sendmessage() {
Properties initialProperties = new Properties();
initialProperties.setProperty("java.naming.factory.initial",
"org.jnp.interfaces.NamingContextFactory");
initialProperties.setProperty("java.naming.factory.url.pkgs",
"org.jboss.naming");
initialProperties.setProperty("java.naming.provider.url",
"127.0.0.1:1099");
try {
context = new InitialContext(initialProperties);
factory = (QueueConnectionFactory) context
.lookup("/ConnectionFactory");
queue = (Queue) context.lookup("/queue/DLQ");
connection = factory.createQueueConnection();
session = connection.createQueueSession(false,
QueueSession.AUTO_ACKNOWLEDGE);
sender = session.createSender(queue);
connection.start();
int count = 0;
while (count < 10) {
TextMessage textMessage = session
.createTextMessage("This is message from client :"
+ count);
sender.send(textMessage);
Thread.sleep(3000);
count++;
}
System.out.println("Messages were sent...");
connection.close();
} catch (NamingException e) {
e.printStackTrace();
} catch (JMSException e) {
e.printStackTrace();
} catch (InterruptedException e) {
e.printStackTrace();
}
}
}
9)Start the server. Once the deployment of bean completes ,The following message will be displayed in the console.
INFO [EJBContainer] STARTED EJB: com.mdb.MDBSample ejbName: MDBSample
(If an exception 'org.jboss.deployers.spi.DeploymentException: Required config property ' throws while deploying the EJB , make the @MessageDriven annotation as of the MDBSample.java shown above.The restart the server.The MDBSample will be deployed now).
10)Now run the MessageSender.java. The output will be displayed in the console. It can be viewed in the log also.Once all the messages were sent by the MessageSender.java 'Messages were sent..' message will be displayed in the console.We can switch the console or check the log to view the received messages by the bean.
See Related Posts:
EJB Stateless Session Bean Example