JSF Tutorial:-Overview
Java Server Faces is widely using in enterprise applications now a days.In this chapter we are just trying to give an overview to JSF.Also we are demonstrating a very basic example.
What is JSF?
Java Server Faces or JSF is a Java Specifcation for developing server side user interfaces. JSF was developed through Java Community Process under JSR-314. The initial specification developed was the JSF 1.0 specification.The standard definition of JSF says “JavaServer Faces technology is a server-side component framework for building Java technology-based web applications “. JSF provides a well-defined programming model and various tag libraries. The tag libraries contain tag handlers that implement the component tags.
Parts of a JSF application
1)A number of web pages
2)Tags to add components to pages
3) Managed Beans:- They are POJOs intended for basic services like resource injection
4)A deployment description(web.xml)
5)Application configuration resource files(such as faces-config.xml):- They are optional .They are using for defining the page navigation rules and for defining components
6)Custom objects(Like validator objects) and custom tags created by the developer
JSF Implementations
1)Apache Myfaces
2)Mojarra JSF implementation
We are discussing a JSF example now.We are using Mojarra implementation in our example
JSF Example
Tools & Softwares needed
1)Java EE SDK
2)Eclipse IDE for Java EE developers
3)Apache Tomcat
4)Apache MyFaces libraries
Steps
1)Install all the required tools including Java EE SDK
2)Download the jstl librariesjstl-api-1.2 jar and jstl-impl-1.2 jar
3)Open eclipse IDE
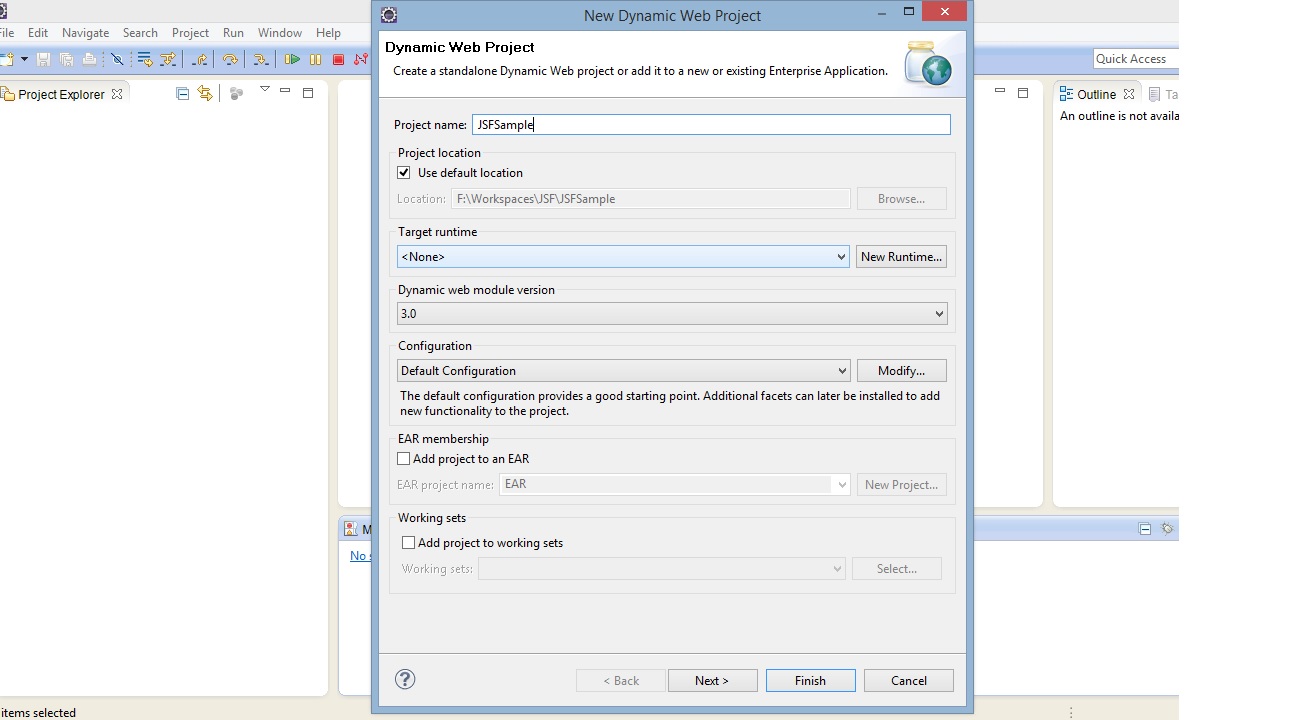
4)Create a new dynamic web project.Give a suitable name to the project
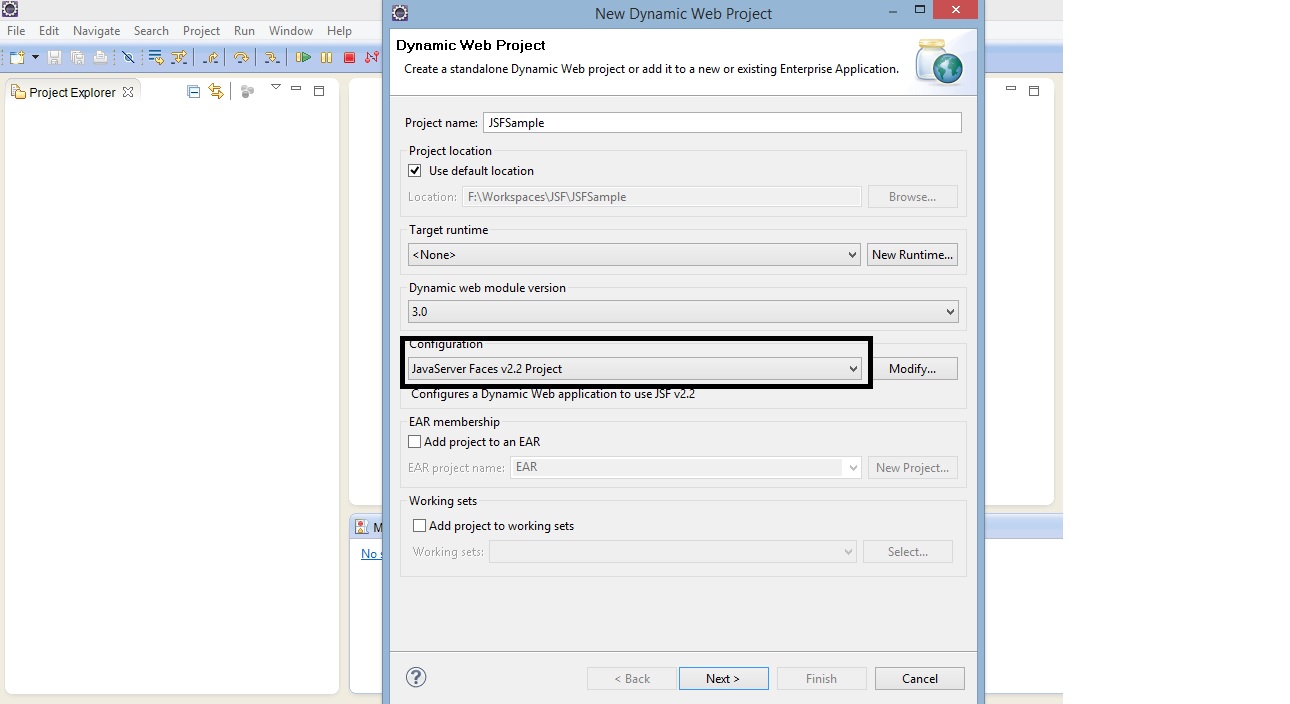
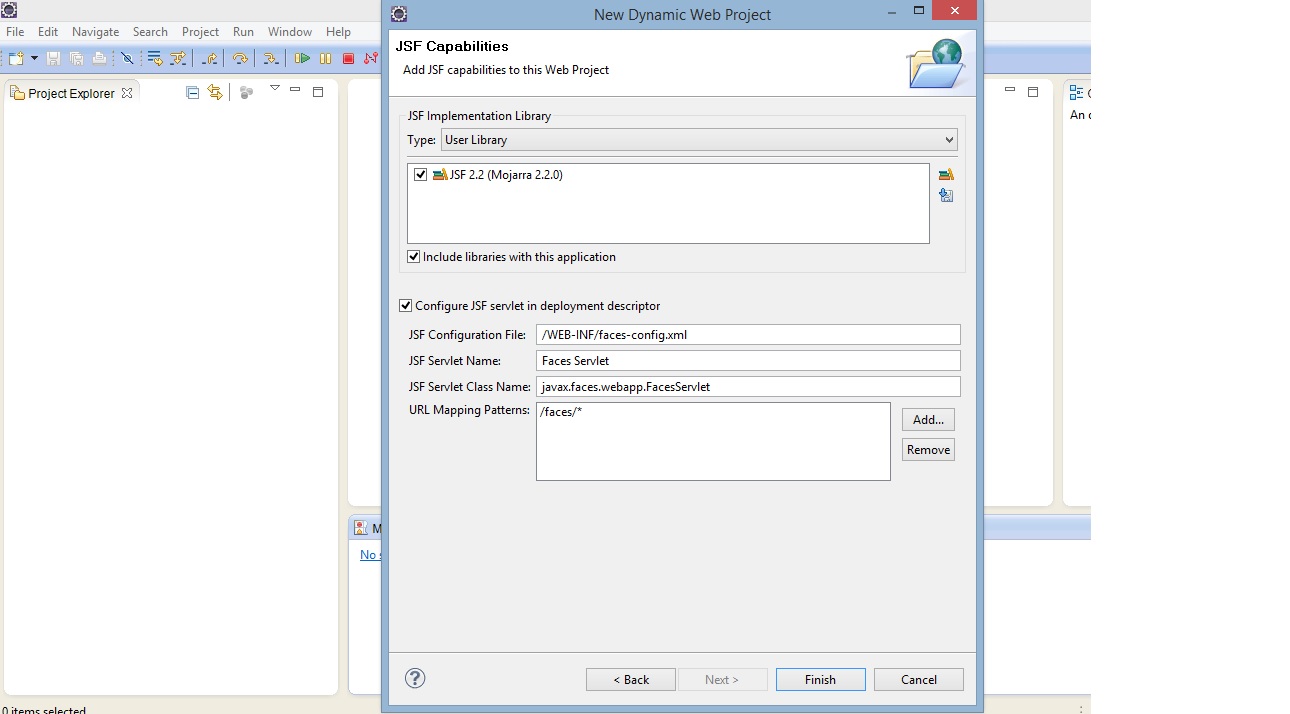
5)Select configuration as JSF 2.2 configuration
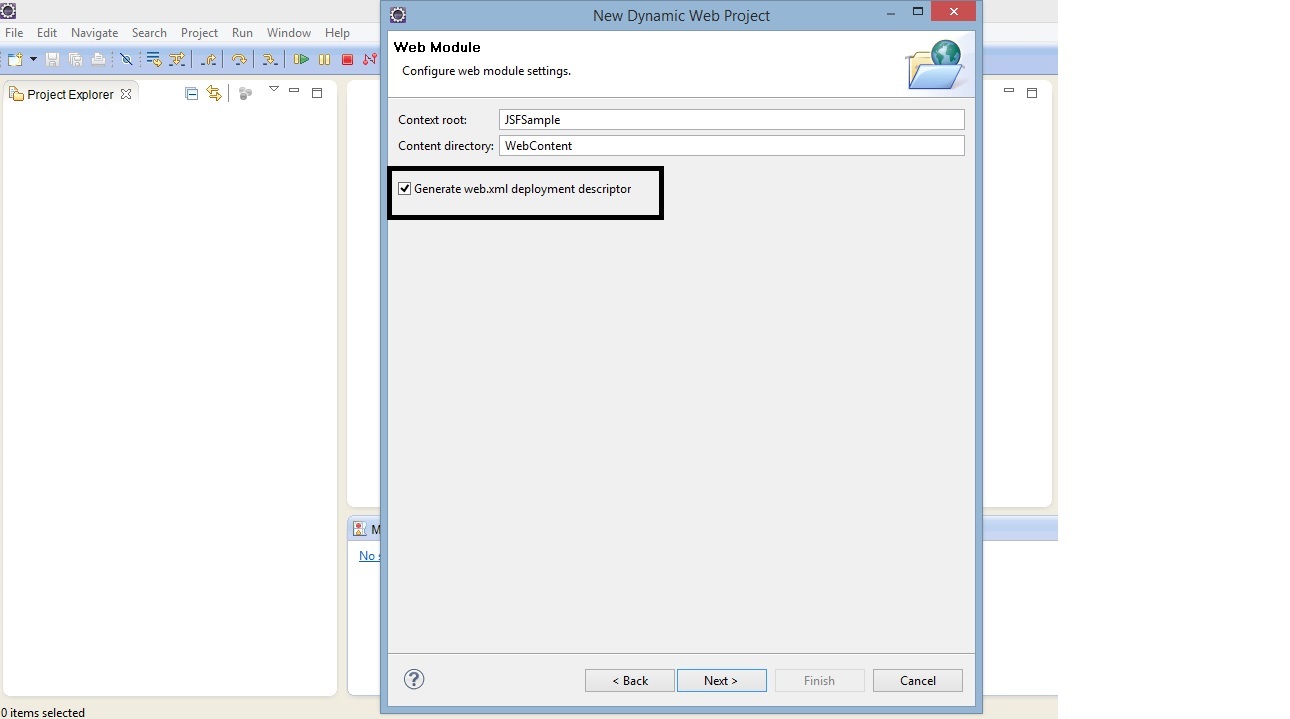
6)Press next and then continue till the generate web.xml page.Select the check box and press next
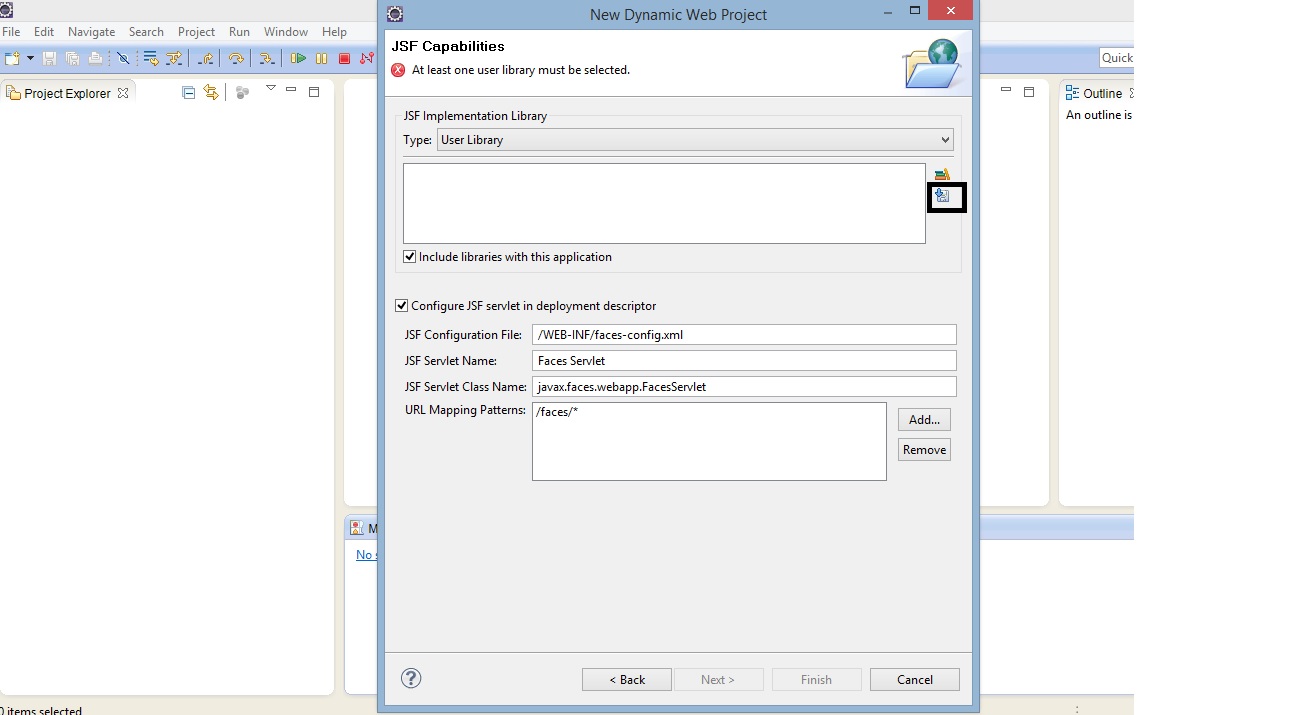
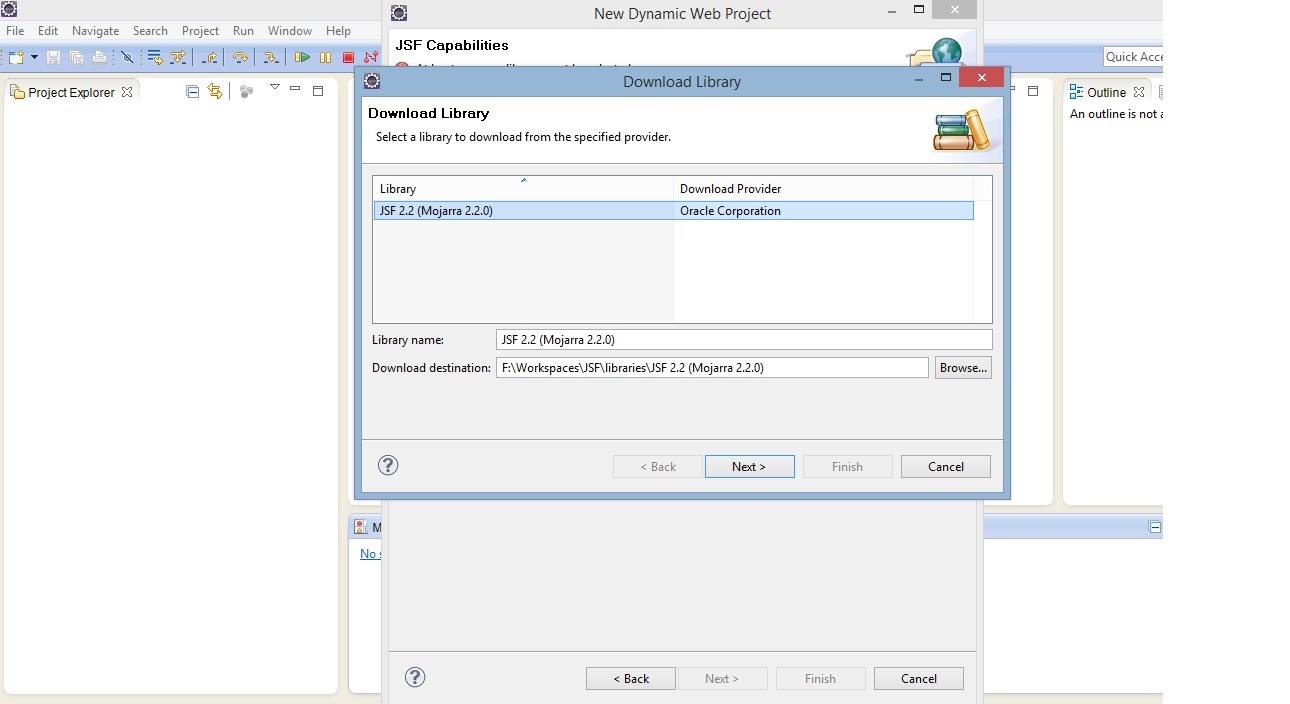
7)In the next section , we can download the Mojarra libraries from eclipse itself
8)Then press Finish.
9)Now put the jstl jar files downloaded in step 2 to the WebContent/WEB-INF/lib folder of the project .
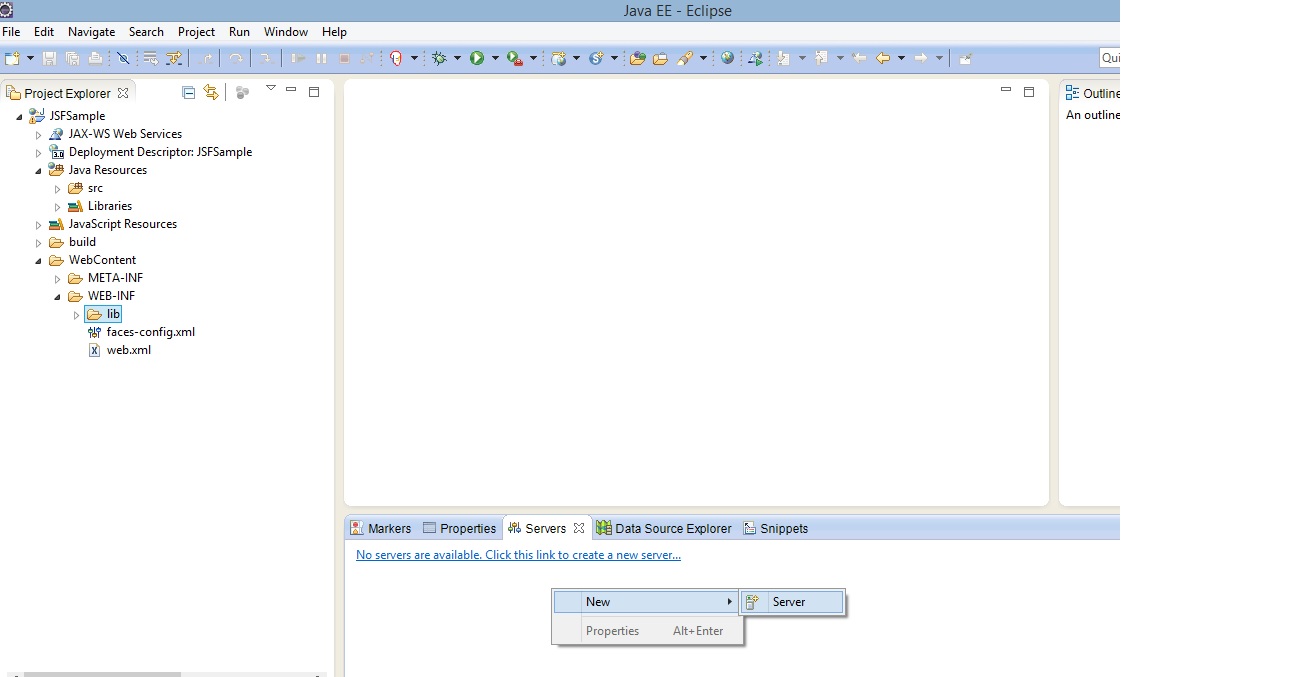
10)Create a Tomcat server instance and add the project to the server.We are using Tomcat 7 in this example.
11)Now create a managed bean for our example.In tis example we are creating a login page with text fields to enter the username and password. So our managed bean should have two attributes.So create a java file in any package in src
UserBean.java
import java.io.Serializable;

import javax.faces.bean.ManagedBean;
import javax.faces.bean.SessionScoped;

@ManagedBean(name="userBean")
@SessionScoped
public class UserBean implements Serializable {

	private static final long serialVersionUID = 1L;
	private String userName;
	private String password;

	public UserBean() {

	}

	public String getUserName() {
		return userName;
	}

	public void setUserName(String userName) {
		this.userName = userName;
	}

	public String getPassword() {
		return password;
	}

	public void setPassword(String password) {
		this.password = password;
	}

	public String toString(){
		return "User Name = "+userName + " ;  Password = "+password;
	}

}
12)Now create an xhtml file:- firstPage.xhtml in WebContent directory
firstPage.xhtml
<?xml version="1.0" encoding="UTF-8"?>
<!DOCTYPE html PUBLIC "-//W3C//DTD XHTML 1.0 Transitional//EN"
"http://www.w3.org/TR/xhtml1/DTD/xhtml1-transitional.dtd">
<html xmlns="http://www.w3.org/1999/xhtml"
	xmlns:f="http://java.sun.com/jsf/core"
	xmlns:h="http://java.sun.com/jsf/html">

<h:head>
	<title>First Page</title>
</h:head>
<h:body>
	<h2>Please Provide the Details</h2>
	<h:form>
		<h:panelGrid>
			<h:outputLabel for='userName' value="Username: "
				style="font-weight:bold" />
			<h:inputText id='userName' value="#{userBean.userName}"></h:inputText>
			<h:outputLabel for='password' value="Password: "
				style="font-weight:bold" />
			<h:inputSecret id='password' value="#{userBean.password}"></h:inputSecret>
			<h:commandButton value="Login" action="secondPage"></h:commandButton>
		</h:panelGrid>
	</h:form>
</h:body>
</html>
We have two text fields and a button in this page .By clicking on the button in this page , navigation happens to the second page.Since this is a basic example , we are not having any navigation rules defined in faces-config.xml file.Those things we will be covering in the coming sections.
13)Now create the second xhtml file- : secondPage.xhtml
secondPage.xhtml
<?xml version="1.0" encoding="UTF-8"?>
<!DOCTYPE html PUBLIC "-//W3C//DTD XHTML 1.0 Transitional//EN"
"http://www.w3.org/TR/xhtml1/DTD/xhtml1-transitional.dtd">
<html xmlns="http://www.w3.org/1999/xhtml"
	xmlns:h="http://java.sun.com/jsf/html">
<h:head>
	<title>Success Page</title>
</h:head>
<h:body>
	<h2>Login Success</h2>
	<h2>Hello #{userBean.userName}</h2>
</h:body>
</html>
14)Ideally no changes are required in the web.xml for running this basic example , if we followed the steps.Also the faces-config.xml would be created automatically.It is the application configuration file in a JSF application.We will be using this file in our coming examples.
15)Now publish the web app by right clicking on the server instance and run the firstPage.xhtml.
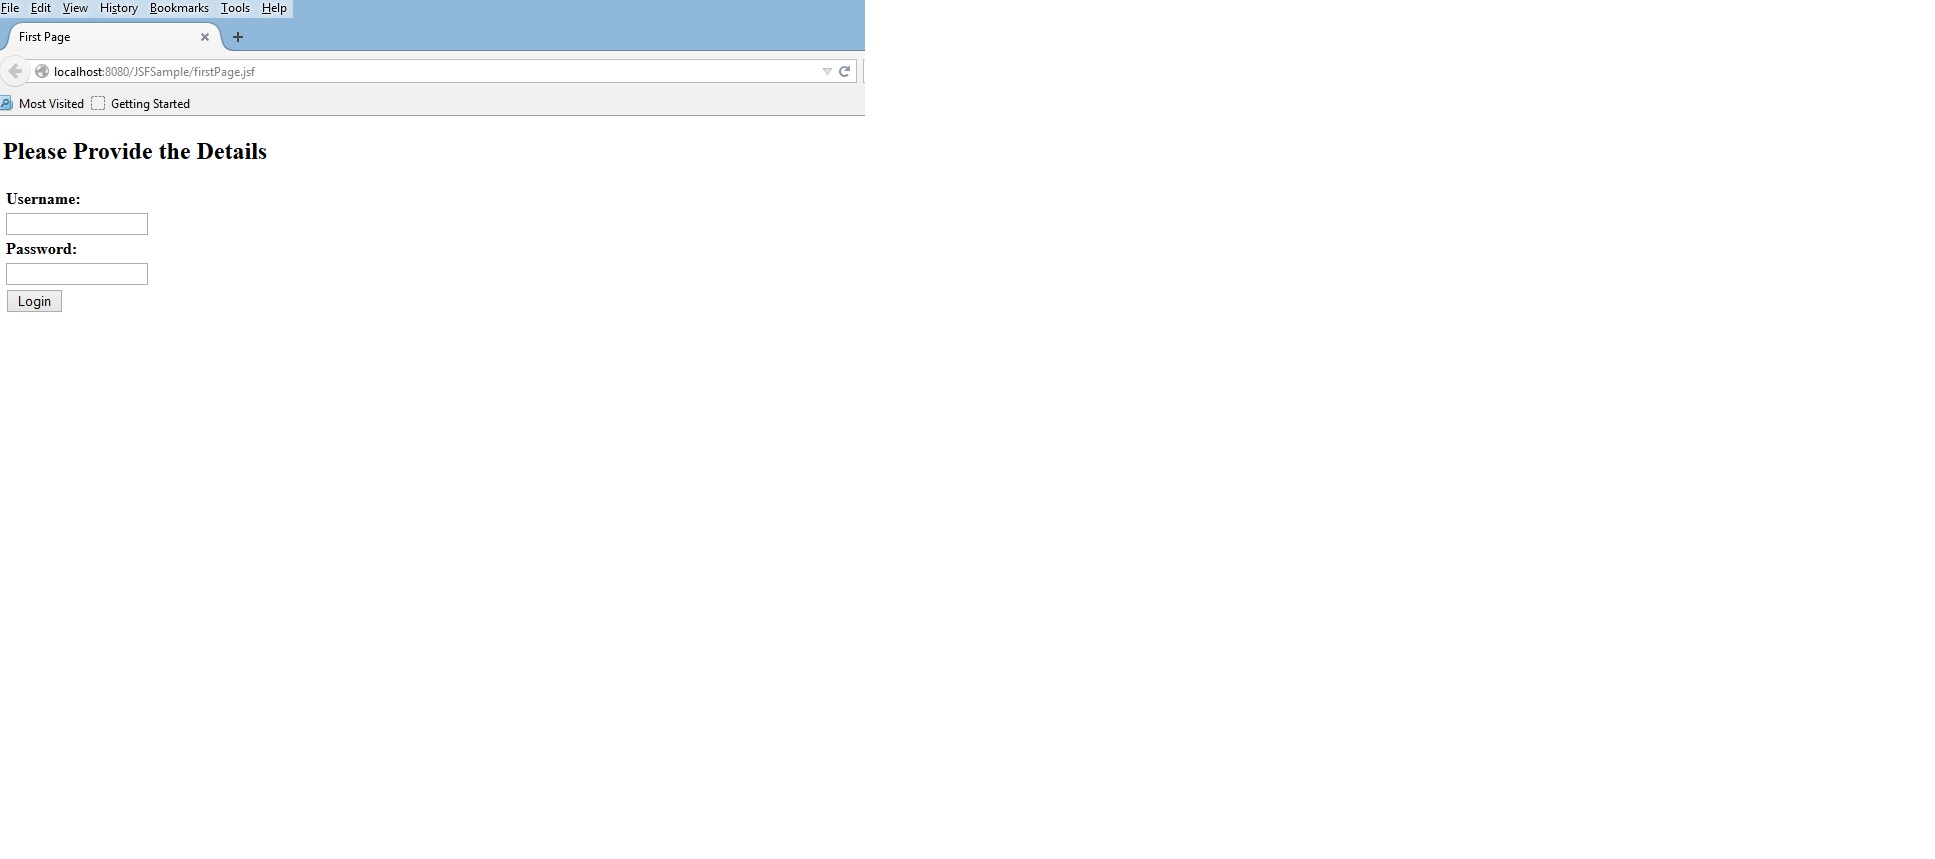
16)Enter any values in the text fields.And press the button.The output page would be shown
